

An Introduction to the Python Pillow Image Library

Pillow describes itself as "the friendly PIL fork", PIL being the now-defunct Python Imaging Library. Fortunately Pillow is still very much alive and provides comprehensive image editing functionality. You could in principle use it as the basis of a sort of lightweight Photoshop type application using perhaps Tkinter or PyQt, but its typical use case is for back-end processing, for example creating thumbnails and adding logos or watermarks to images uploaded to a website.
Despite its powerful and comprehensive abilities it is extremely easy to use and in this article I will introduce what to most users are likely to be its most useful features:
Opening an image and retrieving basic image information
Saving a copy of an image
Resizing
Creating a thumbnail
Rotating
Cropping
Setting individual pixel colours
Enhancing:
color
contrast
brightness
sharpness
Adding a logo or watermark
Installation
These are the installation commands as specified in the documentation.
python3 -m pip install --upgrade pip
python3 -m pip install --upgrade Pillow
The following links are for the Pillow page on PyPI and the full documentation.
The Code
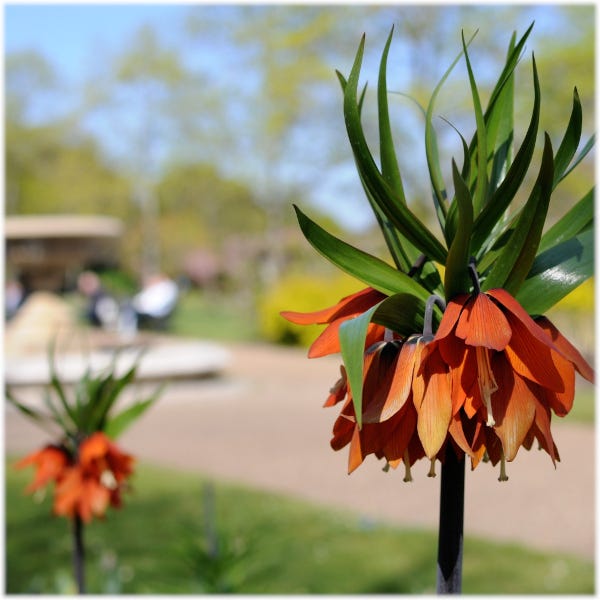
The code for this article consists of a single file called pillowintro.py which lives in the Github repository. The repository also contains a couple of image files: the following photo and a watermark file, although if you run the code you might prefer to use your own images.

This is the entire pillowintro.py code.
import math

import PIL
from PIL import Image
from PIL import ImageEnhance


def main():

    print("--------------------------")
    print("| codedrome.com          |")
    print("| Introduction to Pillow |")
    print("--------------------------\n")

    print(f"Pillow version {PIL.__version__}\n")

    openfilepath = "photo.jpg"

    info_and_copy(openfilepath, "photo_copy.jpg")

    # resize(openfilepath, "photo_resized.jpg")

    # thumbnail(openfilepath, "photo_thumbnail.jpg")

    # rotate(openfilepath, "photo_rotated.jpg")

    # crop(openfilepath, "photo_cropped.jpg")

    # set_pixels(openfilepath, "photo_pixels_set.jpg")

    # color(openfilepath, "photo_color_enhanced.jpg")
    # contrast(openfilepath, "photo_contrast_enhanced.jpg")
    # brightness(openfilepath, "photo_brightness_enhanced.jpg")
    # sharpness(openfilepath, "photo_sharpness_enhanced.jpg")

    # add_watermark(openfilepath, "wmcw.png", "photo_watermark.jpg")


def info_and_copy(openfilepath: str, savefilepath: str) -> None:

    '''
    Outputs basic information about the specified
    image and saves an unedited copy.
    Arguments:
        openfilepath
        savefilepath
    Return value:
        none
    '''

    try:

        image = Image.open(openfilepath)

        print("filename:           {}".format(image.filename))
        print("size:               {}".format(image.size))
        print("width:              {}".format(image.width))
        print("height:             {}".format(image.height))
        print("format:             {}".format(image.format))
        print("format description: {}".format(image.format_description))
        print("mode:               {}".format(image.mode))

        image_copy = image.copy()

        image_copy.save(savefilepath)

    except IOError as ioe:

        print(ioe)

    except ValueError as ve:

        print(ve)


def resize(openfilepath: str, savefilepath: str) -> None:

    '''
    Creates and saves a small copy of the image.
    Arguments:
        openfilepath
        savefilepath
    Return value:
        none
    '''

    try:

        image = Image.open(openfilepath)

        image = image.resize( (100, int(100 * (image.height / image.width))) )

        image.save(savefilepath)

        print("Image resized")

    except IOError as ioe:

        print(ioe)

    except ValueError as ve:

        print(ve)


def thumbnail(openfilepath: str, savefilepath: str) -> None:

    '''
    Creates and saves a thumbnail of the image.
    Arguments:
        openfilepath
        savefilepath
    Return value:
        none
    '''

    try:

        image = Image.open(openfilepath)

        image.thumbnail((100, 100))

        image.save(savefilepath)

        print("Thumbnail created")

    except IOError as ioe:

        print(ioe)

    except ValueError as ve:

        print(ve)


def rotate(openfilepath: str, savefilepath: str) -> None:

    '''
    Rotates image through 270 degrees and saves as a copy.
    Arguments:
        openfilepath
        savefilepath
    Return value:
        none
    '''

    try:

        image = Image.open(openfilepath)

        # without expand=1 the size of the image
        # will remain the same, cropping any
        # non-square images.
        image = image.rotate(270, expand=1)

        image.save(savefilepath)

        print("Image rotated")

    except IOError as ioe:

        print(ioe)

    except ValueError as ve:

        print(ve)


def crop(openfilepath: str, savefilepath: str) -> None:

    '''
    Crops the image and saves as a copy.
    Arguments:
        openfilepath
        savefilepath
    Return value:
        none
    '''

    try:

        image = Image.open(openfilepath)

        # the arguments are the top left and bottom
        # right of the area to be cropped to
        image = image.crop((500, 200, 1200, 800))

        image.save(savefilepath)

        print("Image cropped")

    except IOError as ioe:

        print(ioe)

    except ValueError as ve:

        print(ve)


def set_pixels(openfilepath: str, savefilepath: str) -> None:

    '''
    Sets a number of individual pixels and saves as a copy.
    Arguments:
        openfilepath
        savefilepath
    Return value:
        none
    '''

    try:

        image = Image.open(openfilepath)

        cx = int(image.width / 2)
        cy = int(image.height / 2)

        r = 0
        max_r = math.pi * 2.0
        r_inc = math.pi * 2.0 / 360.0
        radius = min(image.width, image.height) / 16

        while r <= max_r:

            px = int(math.cos(r) * radius) + cx
            py = int(math.sin(r) * radius) + cy

            image.putpixel((px, py), (255,255,255))
            r += r_inc

        image.save(savefilepath)

        print("Image pixels set")

    except IOError as ioe:

        print(ioe)

    except ValueError as ve:

        print(ve)


def color(openfilepath: str, savefilepath: str) -> None:

    '''
    Edits the colour and saves as a copy.
    Arguments:
        openfilepath
        savefilepath
    Return value:
        none
    '''

    try:

        image = Image.open(openfilepath)

        enhancer = ImageEnhance.Color(image)

        image = enhancer.enhance(2.0)

        image.save(savefilepath)

        print("Image color enhanced")

    except IOError as ioe:

        print(ioe)

    except ValueError as ve:

        print(ve)


def contrast(openfilepath: str, savefilepath: str) -> None:

    '''
    Edits the contrast and saves as a copy.
    Arguments:
        openfilepath
        savefilepath
    Return value:
        none
    '''

    try:

        image = Image.open(openfilepath)

        enhancer = ImageEnhance.Contrast(image)

        image = enhancer.enhance(2.0)

        image.save(savefilepath)

        print("Image contrast enhanced")

    except IOError as ioe:

        print(ioe)

    except ValueError as ve:

        print(ve)


def brightness(openfilepath: str, savefilepath: str) -> None:

    '''
    Edits the brightness and saves as a copy.
    Arguments:
        openfilepath
        savefilepath
    Return value:
        none
    '''

    try:

        image = Image.open(openfilepath)

        enhancer = ImageEnhance.Brightness(image)

        image = enhancer.enhance(0.5)

        image.save(savefilepath)

        print("Image brightness enhanced")

    except IOError as ioe:

        print(ioe)

    except ValueError as ve:

        print(ve)


def sharpness(openfilepath: str, savefilepath: str) -> None:

    '''
    Edits the sharpness and saves as a copy.
    Arguments:
        openfilepath
        savefilepath
    Return value:
        none
    '''

    try:

        image = Image.open(openfilepath)

        enhancer = ImageEnhance.Sharpness(image)

        image = enhancer.enhance(2.0)

        image.save(savefilepath)

        print("Image sharpness enhanced")

    except IOError as ioe:

        print(ioe)

    except ValueError as ve:

        print(ve)


def add_watermark(openfilepath: str, watermarkfilepath: str, savefilepath: str) -> None:

    '''
    Adds a watermark from a file and saves as a copy.
    Arguments:
        openfilepath
        watermarkfilepath
        savefilepath
    Return value:
        none
    '''

    try:

        main_image = Image.open(openfilepath).copy()
        watermark_image = Image.open(watermarkfilepath)

        # calculate position of watermark to leave
        # a bit of space (16px) at the bottom right.
        x = main_image.size[0] - watermark_image.size[0] - 16
        y = main_image.size[1] - watermark_image.size[1] - 16

        main_image.paste(watermark_image, (x, y), watermark_image)

        main_image.save(savefilepath)

        print("Watermark added")

    except IOError as ioe:

        print(ioe)

    except ValueError as ve:

        print(ve)


if __name__ == "__main__":

    main()
Imports
Pillow consists of a number of different modules and uses the name PIL rather than Pillow to maintain backwards compatibility with PIL. Here I have imported PIL to retrieve the version number, and Image and ImageEnhance for the actual image manipulations. I have also imported math but that's for a couple of calculations not directly related to image editing or Pillow as you'll see further down.
The main function
The main function prints a heading and the current version of Pillow before creating a variable to hold the image file name. After that we just call a number of functions, most of which are commented out at the moment so we can run them one at a time.
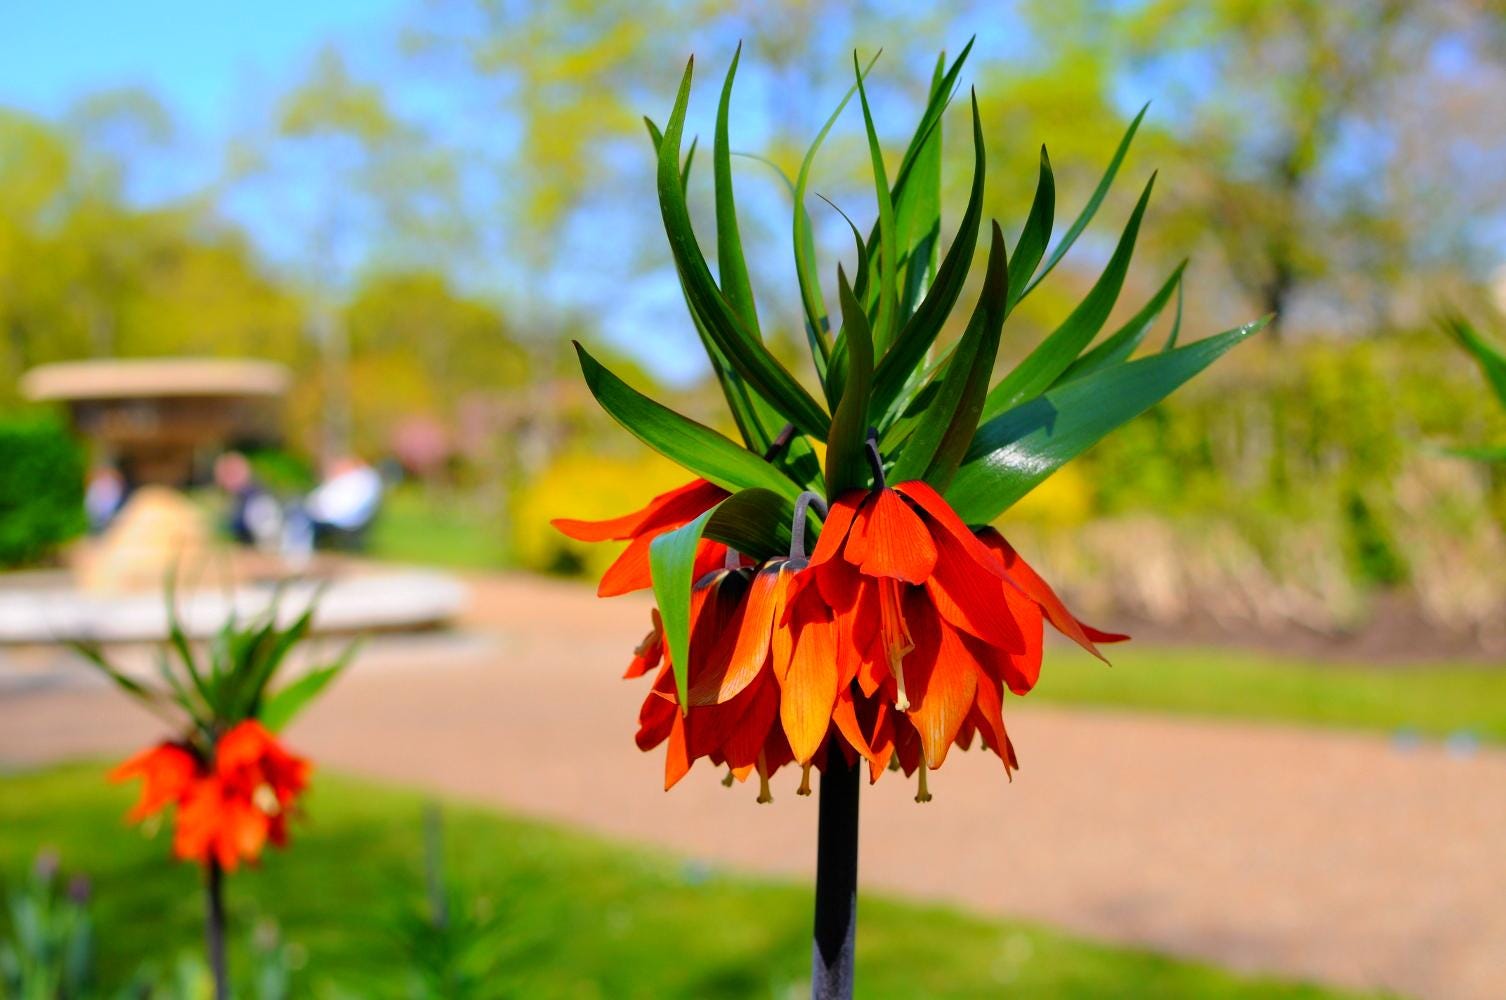
Image Info and Copying
The info_and_copy function takes two filepaths, the existing image and the file to save a copy to. It calls Image.open (Image being the core Pillow class) which returns an image if successful. The image contains a number of attributes which are then printed out. The image size can be retrieved in two ways: using size which returns a tuple or using the individual height and width attributes. The Image class is "lazy" and does not load data from the file until it actually needs it, therefore if you just need to see the image information you will not waste memory loading a large image you don't actually need.
We then call the image's copy method which (obviously!) returns a copy. Finally we call the save method on this copy. It isn't strictly necessary to create a copy - we could just call save on the original image with the new filename but I have used a copy here just to demonstrate the method. Perhaps unusually we do not need to tell the save function the format as it deduces it from the filename extension so for example you can convert a JPEG to a PNG just by specifying a filename ending with .png. If you open the folder containg the source code and image file you will find a copy of the latter has been created.
This short function actually needs two exception handlers. The first for IOErrors deals with invalid filenames and the like while the second for ValueErrors deals with situations where the save method cannot deduce the format from the filename extension.
We now have enough to run so do so with this command.
python3 pillowintro.py
This will give us the following output.
Resizing
Now we can get into doing some image manipulations, starting with the resize function. Again this takes an input and an output filepath and calls open and save with the same exception handling as info_and_copy. These are common to all the subsequent functions so I won't mention them again.
The Image class's resize method takes a tuple containing width and height (this is a common pattern in Pillow). I have used a width of 100 and a height calculated from the original image's height/width ratio to maintain the shape. This is cast to an int in case the division gives a decimal.
Comment out info_and_copy in main, uncomment resize and run the program again. I won't show the console output as it's very boring but you will find this image has been created in your folder.

Creating a Thumbnail
There is actually a better way of creating thumbnails, by using the thumbnail method. This takes a tuple with the maximum width and height and does the calculation to preserve the size ratio for us. Most Image methods return a new object but thumbnail edits the existing image, although we can create a new file by passing a different filename to the save method. There are several quirks and inconsistencies like this in Pillow.
Run the program with the thumbnail function uncommented in main and we'll get this image.
If you look closely you'll see that this image is slightly smoother than the one created using resize. The resize and thumbnail methods both have optional resample arguments so evidently use different defaults. This is a slightly more advanced topic I'll look into for a later post.
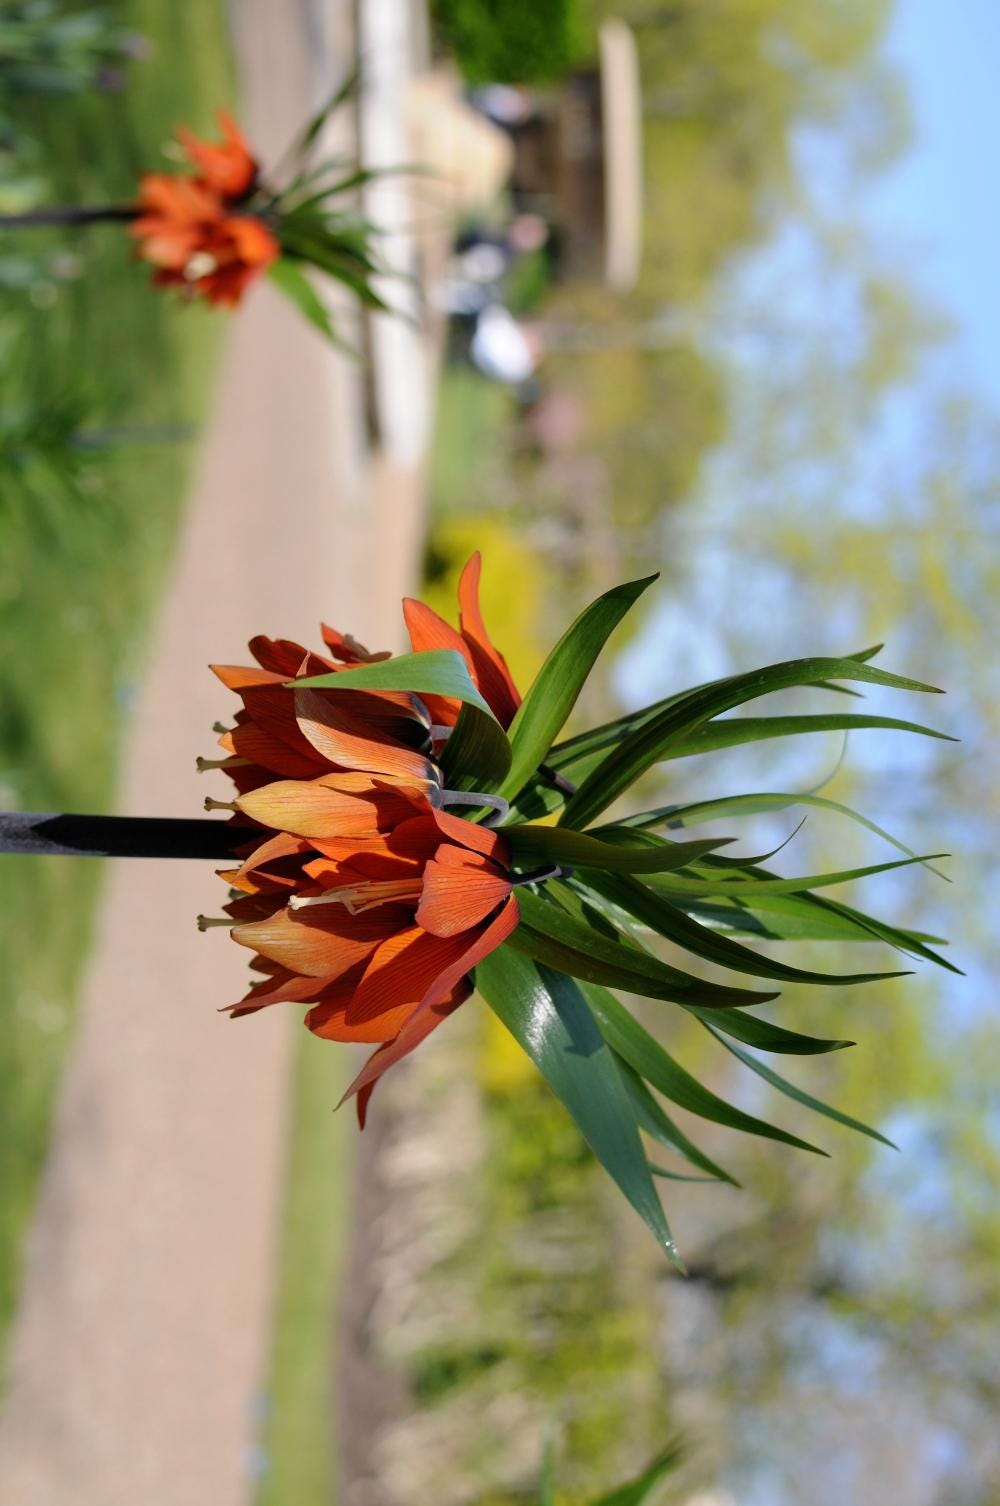
Rotating
The rotate method's first argument is the angle in degrees to rotate anticlockwise. There is also a second optional argument called expand. If this is omitted (or set to 0) the height and width of the image are left unchanged which means that unless the image is an exact square you will lose some of it and leave some space empty. This is unlikely to be what you want so you will generally need to set expand to 1 as I have done here.
Run the program with rotate uncommented and you'll get this, the image rotated by 270°.
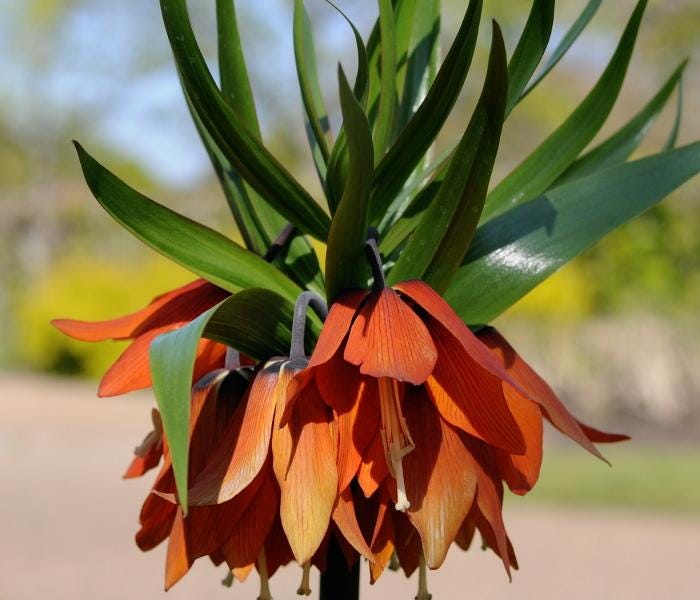
Cropping
The crop method takes a tuple of 4 coordinates specifying the top left and bottom right corners of the rectangle the image should be cropped to. Obviously the latter needs to be to the right and below the former, and both need to be within the original image. The documentation does not say what happens if they are not but you might like to experiment if you have nothing better to do . . . !
This is the image resulting from running this function.
Setting Pixels
The putpixel method gives you ultimate (but slow) control over an image by allowing you to set the colour of any pixel. This is another in-place method as modifying a pixel and returning a new image many times in a loop would bring things grinding to a halt. The first argument is a tuple of the x and y coordinates of the pixel, the second a tuple of RGB values, or a single value for single-channel images, or RGBA values for an image with transparency. To get the value of a pixel you can use the getpixel method.
Here I have used a bit of trigonometry (hence the import math) to draw a small white circle in the middle of the image. Not a particularly useful thing to do but it does illustrate that in principle you can edit or create an image one pixel at a time. To create drawings with lines, circles etc. Pillow provides the ImageDraw module.

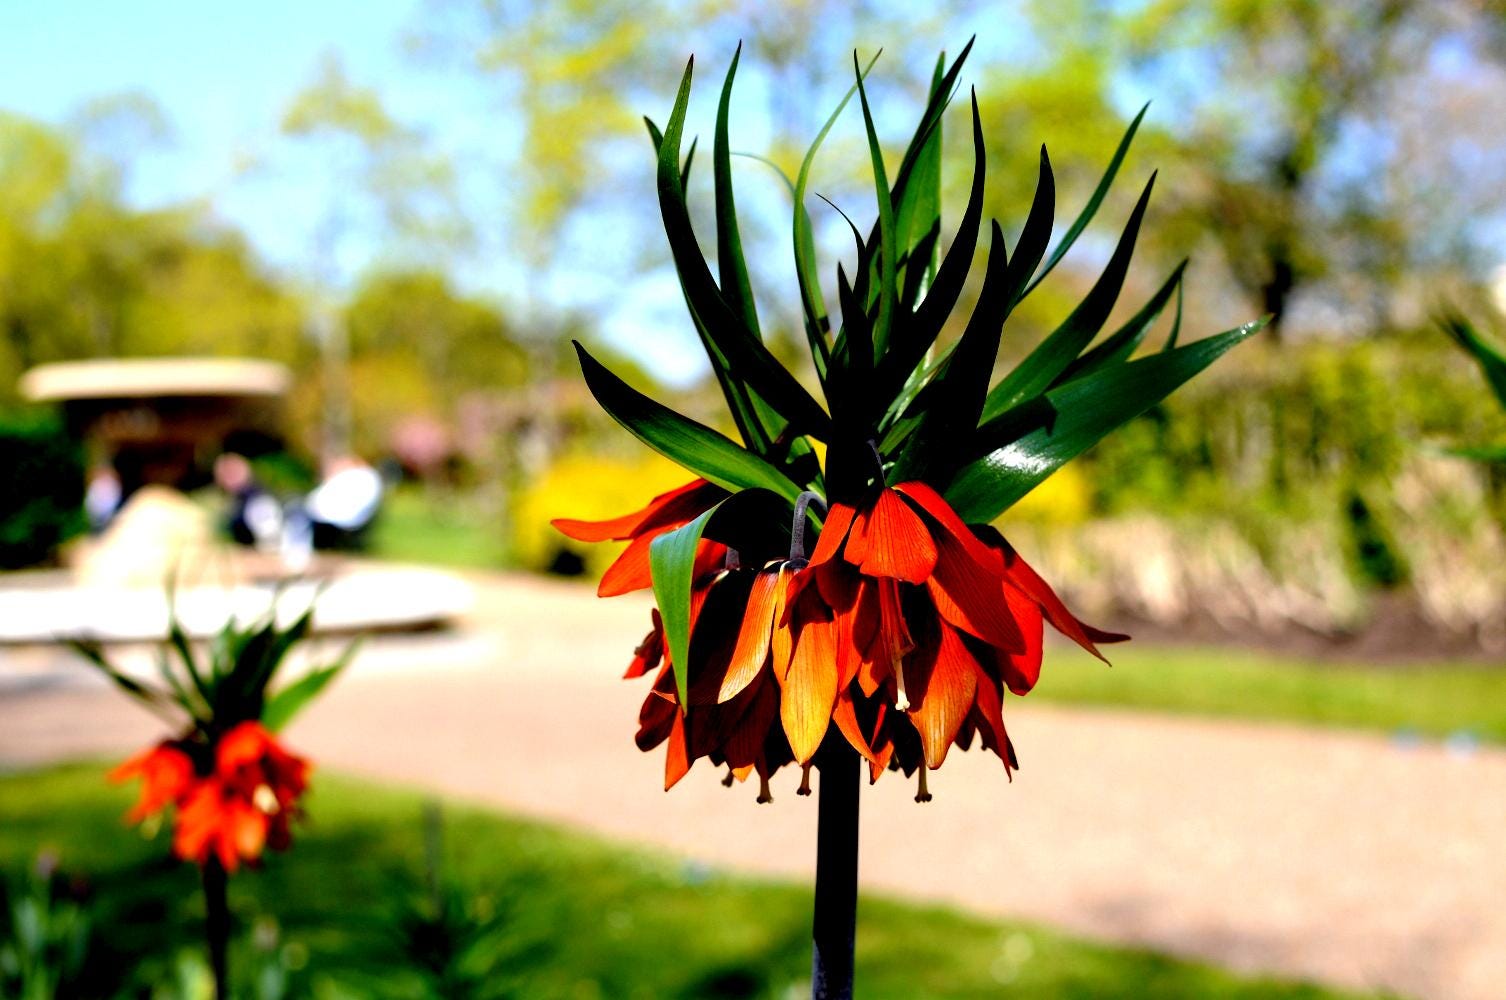
Color
Now lets look at the more advanced functionality provided by the ImageEnhance module, starting with ImageEnhance.Color. This could perhaps have been more accurately named Saturation, and like the Contrast, Brightness and Sharpness classes I'll look at in a moment it returns an object providing an enhance method. This method takes a numeric argument specifing the amount of the enhancement; the documentation is vague about any minimum and maximum values but in all four cases 1.0 means no change, lower values giving a decrease and higher values giving an increase. Generally values between 0 and 2 are all you are likely to need, with values outside this range giving extreme or odd effects.
In the case of color, 0 reduces the image to black and white and values less than 0 actually give a negative coloured image. Values of more than one increase saturation, for example 2.0 increases saturation to the rather garish level you can see below. Go beyond 2 at your own risk!
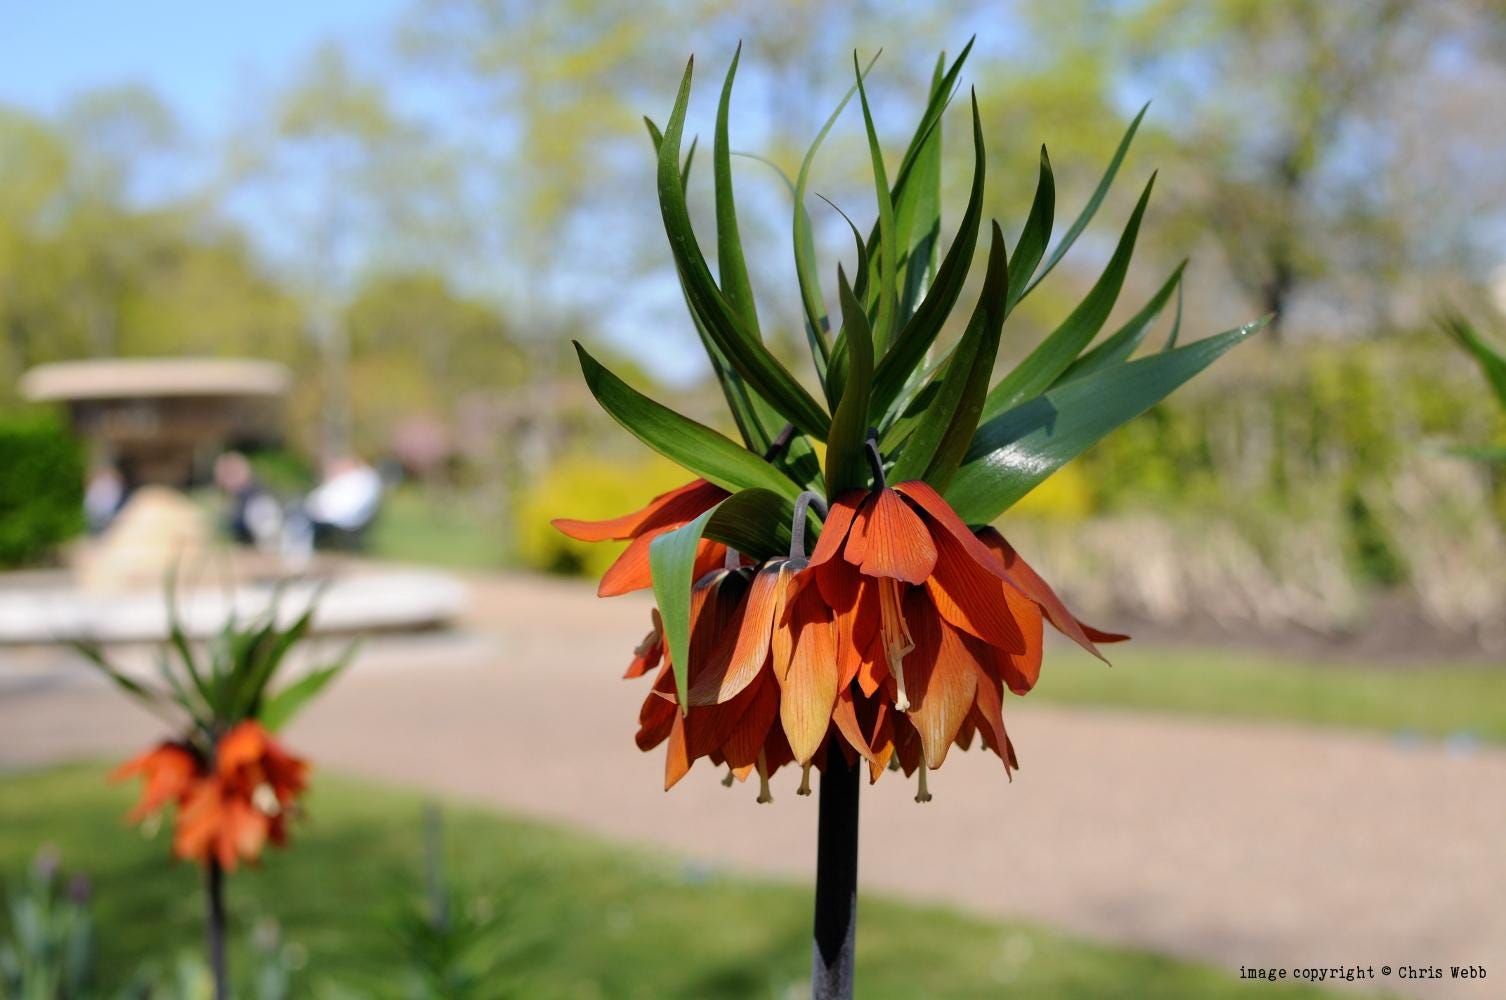
Contrast
This works in the same way as Color. Values between 0 and 1 give various levels of decreased contrast with 0 itself giving plain grey, while values above 1 give increased contrast. As with Color, values below 0 give a negative effect. This is the unpleasant result of increasing contrast to 2.0.
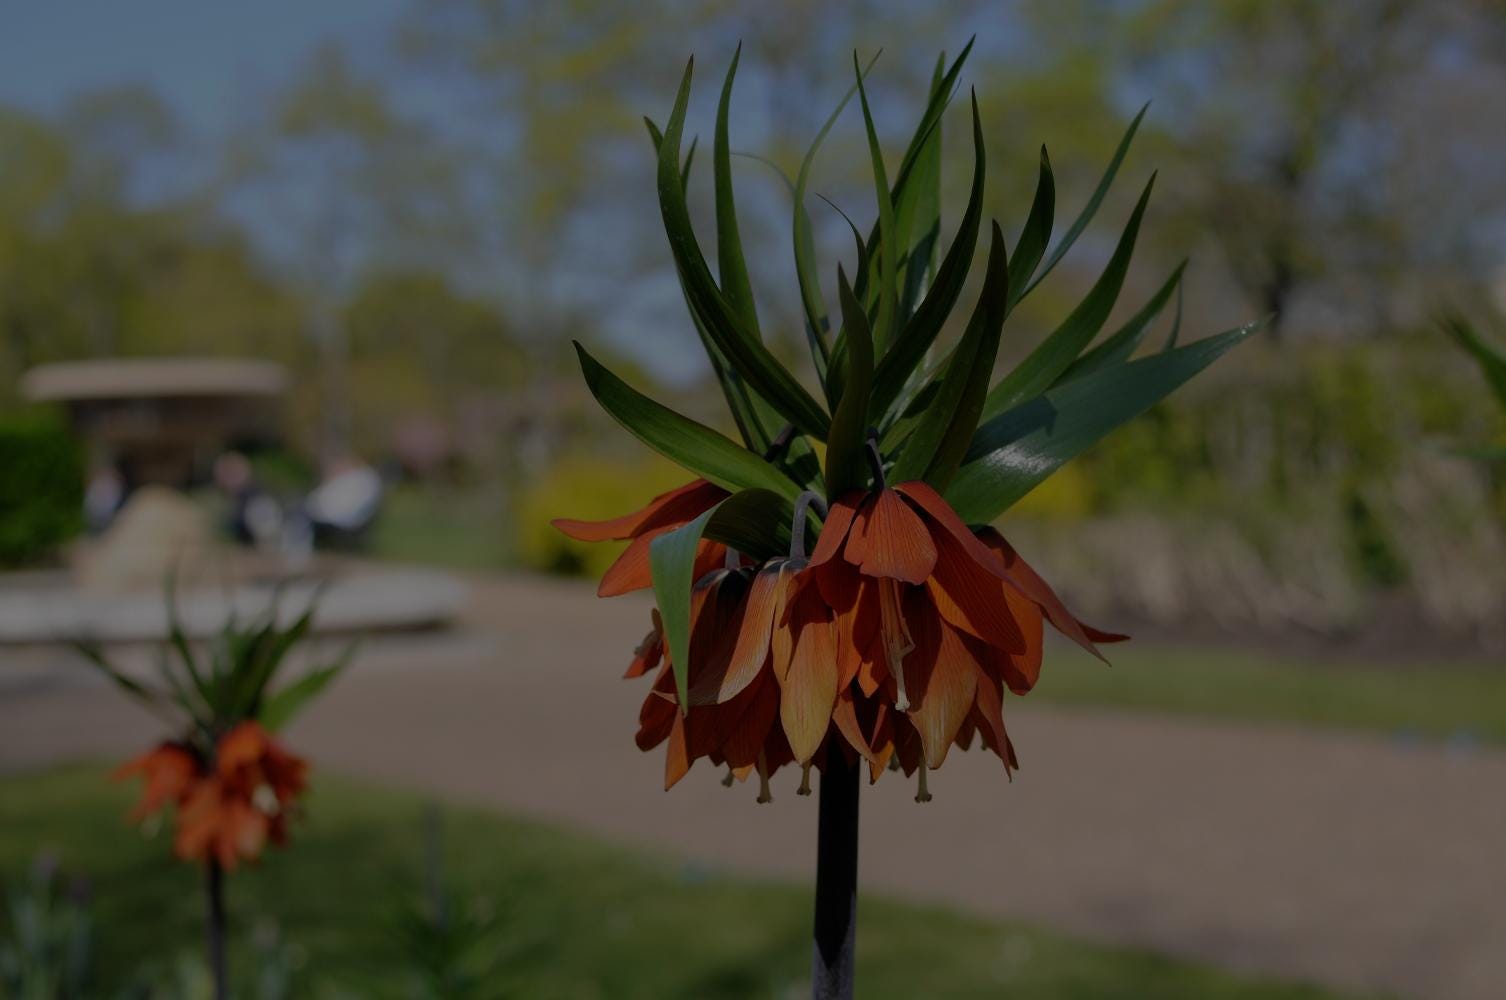
Brightness
Values of 0 and less give a completely black image, whereas values between 0 and 1 give an image with reduced brightness, for example this is the image with brightness reduced to 0.5. Values over 1 increase brightness.
Sharpness
Values greater than 1 increase sharpness while values less than 1 (including values less than 0) decrease sharpness or increase blur. This is the image sharpened (I should say "over-sharpened") to 2.0. Use sharpening subtly if at all.

Adding a Watermark
Included in the Github repo is a small PNG called wmcw.png. This is it:

And this is it pasted onto the photograph as a watermark. If you create your own watermark or logo you will need to give it a transparent background.
In the add_watermark function we open both images, the filenames of which are the first two function arguments, and then calculate the position of the watermark. However large either image, the watermark will have its bottom right hand corner 16 pixels above and left of the bottom right corner of the image.
In the line opening the image file I sneaked in a bit of method chaining to copy the file. After calculating the coordinates I then call the paste method of the main image: the arguments are the image to paste, a tuple holding the coordinates, and then an image to use as a transparency mask, specifically the watermark image again. Finally we just need to save the watermarked file.
Method Chaining
Most of the Image methods I used in this project return a new object. This means that we can call several methods in one line of code, for example:
Image.open(openfilepath).rotate(270, expand=1).save("rotated.jpg") This works because the rotate method is called on the object returned by open, and the save method is called on the object returned by rotate. This is a common technique but one which I prefer not to use too much, although I did it once in the watermark function. This is because I feel that if a line does two, three or more things the code is harder to read and therefore harder to maintain and debug. This is just my opinion and as I said method chaining is common so I thought I at least ought to mention and demonstrate it.
Conclusion
I hope you found this introduction to Pillow useful, but bear in mind that it can do much more and I have a few more articles planned to explore more of the library's functionality.
No AI was used in the creation of the code, text or images in this article.