

Exploring the Visible Spectrum with Python Part 1

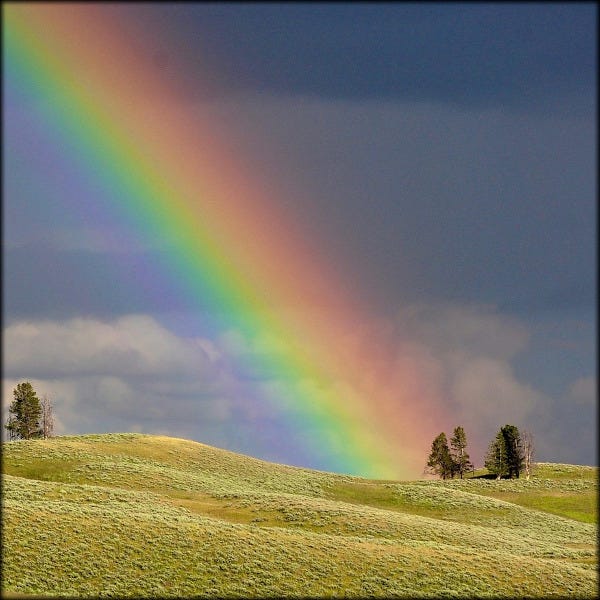
The Visible Spectrum
The electromagnetic spectrum covers a vast range of wavelengths and frequencies from long wavelength/low frequency radio waves to short wavelength/high frequency gamma rays. Roughly in the middle is a small band of light visible to the human eye, the familiar colours of the rainbow. Wavelengths and frequencies are inversely proportional: if you double one the other is halved. The relationship between the two can easily be plotted and in this post I will write code in Python to do just that.
Wavelengths of electromagnetic radiation range from 1 picometre (one trillionth of a metre) to 100,000 km (about a quarter of the way to the moon). Each wavelength has a corresponding frequency, and it is best to think of wavelengths and frequencies as two ways to measure the same thing.
The visible part of the electromagnetic spectrum has wavelengths from approximately* 380nm (nanometres, or billionths of a metre) to 780nm. The corresponding frequencies go from 789THz (terahertz, 1 trillion Hertz) to 384Thz. As I mentioned above wavelengths and frequencies are inversely proportional so as wavelengths increase frequencies decrease.
* There is no fixed definition of visible light; 380nm seems widely accepted as the starting point of the violet end of the spectrum but estimates of the finishing point of the red end range from just 700nm to the 780nm I will be using.
The following graphic should make the wavelength/frequency relationship clear.

The violet wave has a short wavelength, ie the distance between two points at the same height. This means we can cram 4 waves into this small graph: low wavelength = high frequency.
The red wave has a wavelength twice as long as the violet wave so we can only get two of them into the same space: high wavelength = low frequency.
Calculating frequency from wavelength is simple, we just divide the speed of light by the wavelength. We need to be careful with units though: with loads of nanos, teras etc. floating around we can easily get errors of many orders of magnitude. I'll deal with this when we get to the code.
A particular wavelength/frequency also has an associated energy. I won't plot those here but will calculate them for display in a table. It is a tiny constant called Planck's constant multiplied by the frequency, the result being in Joules.
A Question of Order
As a small child I learned the colours of the rainbow as "violet, indigo, blue, green, yellow, orange, red" which are in ascending order of wavelength. I wouldn't have known that at the time but would have recognised the colours as being those of a rainbow from bottom to top.

However, I'm aware that some people know the colours as "red, orange, yellow, green, blue, indigo, violet" which of course is the top-to-bottom order and more technically in ascending order of frequency.

For this project I'll print a range of wavelengths in ascending order with their corresponding frequencies in descending order. In part 2 I'll graph the wavelengths/frequencies in ascending order of wavelengths, and wavelengths/energies in ascending order of energies. There is no right or wrong way, it's just an arbitrary decision or matter of personal preference.
The Project
This project consists of the following files which live in the GitHub repository.
vsdata.py
vsoutput.py
vsdemo.py
wavelengthrgb.py
The wavelengthrgb.py file contains code to calculate red, green and blue values from wavelengths, my version of code originally written by Dan Bruton in Fortran. I'll write a separate article about this so for now just treat it as a "black box".
NumPy and Matplotlib
The code uses two external libraries, NumPy and Matplotlib. NumPy provides the array I'll use for wavelengths, frequencies etc, and Matplotlib is used to plot these values.
They can both be installed easily with pip, and these are the links to them on PyPi.
https://pypi.org/project/numpy/
https://pypi.org/project/matplotlib/
The Data
The vsdata module creates a dictionary of several NumPy arrays, each containing values representing a certain property of the colours of the visible spectrum.
nm - wavelengths in nanometres
A nanometre is one billionth of a metre, and I'll assume the visible spectrum goes from 380nm to 780nm (violet to red).
THz - frequencies in terahertz
A teraherta is 1,000,000,000,000 or 1 trillion per second. The range of visible light goes from 7.89x10^14Hz to 3.84x10^14Hz, or 789THz to 384THz.
Jsnsig - energy in joules* of 1 photon of a particular wavelength/frequency
The values are significands of scientific notation with exponents of -19. They range from 5.23 to 2.54 so represent 5.23x10⁻¹⁹J to 2.54x10⁻¹⁹J. I went for conciseness over clarity with the name - it's a cryptic contraction of "joules scientific notation significand". Sorry!
rgb and rgbtuples - Red, Green and Blue Values
These are the red-green-blue values of the colours in two different formats:
rgb: an array containing 3 arrays, one each for red, green and blue values 0 to 255
rgbtuples: an array of tuples containing red, green and blues values as decimals 0 to 1
The rgb arrays are how the values are calculated, and these are then used to create rgbtuples for use by Matplotlib.
* The joule isn't a familiar everyday unit and my favourite definition is that 1J is the energy required to lift (on Earth) a tomato by 1 metre. Obviously a photon couldn't lift a tomato very far but if you want to convince yourself that light can actually push matter search for videos of a crookes radiometer.
The Code
This is vsdata.py, containing a single function which generates the data described above.
from typing import Dict

import numpy as np

import wavelengthrgb as wlrgb


def generate_data(interval: int=1) -> Dict:

    """
    Creates a dictionary containing
    NumPy arrays of data on the visible
    portion of the electromagnetic spectrum.
    The interval is the wavelength in nanometres.
    """

    wavelength_to_rgb = np.vectorize(wlrgb.wavelength_to_rgb)

    c = 3 * 10**8  # speed of light in m/s
    h = 6.62607015 * 10**-34  # Planck's constant in Js

    # array of wavelengths in nanometres
    nm = np.arange(380,781,interval)

    # interim array of frequencies in hertz
    Hz = c / (nm * 10**-9)
    # calculate terahertz from hertz
    THz = Hz * 10**-12

    # interim array of energies in joules
    J = h * Hz
    # calculate joules^-19 to provide the
    # significand of scientific notation
    Jsnsig = J * 10**19

    # array of rgb values
    rgb = wavelength_to_rgb(nm)

    # rgb values in tuple form
    rgbtuples = tuple(tv/255 for tv in rgb)
    rgbtuples = np.rec.fromarrays(rgbtuples)

    # assemble arrays into dictionary
    data = {'nm': nm,
            'THz': THz,
            'Jsnsig': Jsnsig,
            'rgb': rgb,
            'rgbtuples': rgbtuples}

    return data
There's a lot going on in this function so I'll go through it one step at a time.
The wavelength_to_rgb function in wavelengthrgb takes individual wavelength values but we'll need to call it with a NumPy array. Passing the function to np.vectorize creates a wrapper function enabling us to do so.
The c and h values are constants, coded here as scientific notation expressions (ie powers of 10) which are evaluated to create the values. (The Python convention is to use ALL UPPER-CASE for constants but as c and h are standard throughout physics I decided to use them.)
Next we use NumPy's arange method to create an array of wavelength values in nanometres across the specified range and with the specified interval.
Frequencies are calculated by dividing the speed of light c by the wavelength in metres. However, our wavelengths are in nanometres so need to be converted on the fly, and the results are in hertz (Hz) which are used here as interim values. (As a general rule formulas in physics are expressed in SI units however inconveniently large or small the actual values might be.)
Next an array of frequencies in terahertz (THz) is calculated from the Hz values.
The same situation applies to energies: multiplying Planck's constant h by Hz gives joules. These are then used to calculate the significands of the values in scientific notation. (Note that there is no metric prefix for 10-19 unlike with, for example, terahertz or nanometres.)
The next lines throws the nanometres array at the vectorized version of wavelength_to_rgb created earlier. The result is an array of three arrays, one each for R, G and B. These numbers are from 0 to 255, for example the first items in each array are for violet and are 97 (a fair amount of red), 0 (no green) and 97 (the same amount of blue as red).
The next couple of lines aren't pretty but they do the job. (If anyone can think of a more elegant way of doing this please let me know). The first line divides each value by 255 to get decimal fractions from 0 to 1, converting the whole lot to a tuple. The second line creates a NumPy record arrays (numpy.rec) using the fromarrays method. This contains the RGB tuples as needed by Matplotlib.
Finally all the arrays are assembled into a dictionary and returned.
This is vsoutput.py (partial).
from typing import Dict

import matplotlib
import matplotlib.pyplot as plt


def to_console(data: Dict) -> None:

    """
    Prints the data structure returned by
    vsdata.generate_data in a table format.
    """

    heading = f"| {chr(955)}(nm) | f(THz) |    E(J)    |  R  |  G  |  B  |"

    print("-" * len(heading))
    print(heading)
    print("-" * len(heading))

    for i in range(0, len(data['nm'])):

        print(f"| {data['nm'][i]:>5.0f} |", end="")
        print(f" {data['THz'][i]:>6.0f} |", end="")
        print(f" {data['Jsnsig'][i]:>4.2f}x10⁻¹⁹ |", end="")

        print(f" {data['rgb'][0][i]:>3.0f} |", end="")
        print(f" {data['rgb'][1][i]:>3.0f} |", end="")
        print(f" {data['rgb'][2][i]:>3.0f} |")

    print("-" * len(heading))
This code takes the dictionary from generate_data and prints it as a table.
Finally we have vsdemo.py.
import vsdata
import vsoutput


def main():

    data = vsdata.generate_data(interval=8)

    vsoutput.to_console(data)

    # vsoutput.plot_wavelengths_frequencies(data)

    # vsoutput.plot_wavelengths_energies(data)


if __name__ == "__main__":

    main()
After importing the above two modules the main function calls vsdata.generate_data and then passes it to vsoutput.to_console. The commented out functions will be covered in Part 2 but you can run them now if you wish, but if you do change the interval argument in generate_data to 1.
Running the Program
Now we can run the program:
python3 vsdemo.py
This is the end result.

Conclusion
In Part 2 I'll examine the code which generates Matplotlib plots of the data, but all the code is in the repository already if you want to look at and run it. Also I am working on another article on the code in wavelengthrgb.py which creates RGB values from wavelengths.